Education Through Play?
One of two things seem to happen when I mention that we plan to homeschool our children. One is that we are applauded for me having the patience to be Mama and Teacher. The other is total confusion. With the argument that the school systems are more equipped to teach kids. I am sure they are, no doubt there. I went to public school as a child. This was not something that we decided overnight, and as our children grow older we will discuss going to public school or even private school if they ask. However; things have changed in both the public school culture and homeschooling cultures since us parents were children.
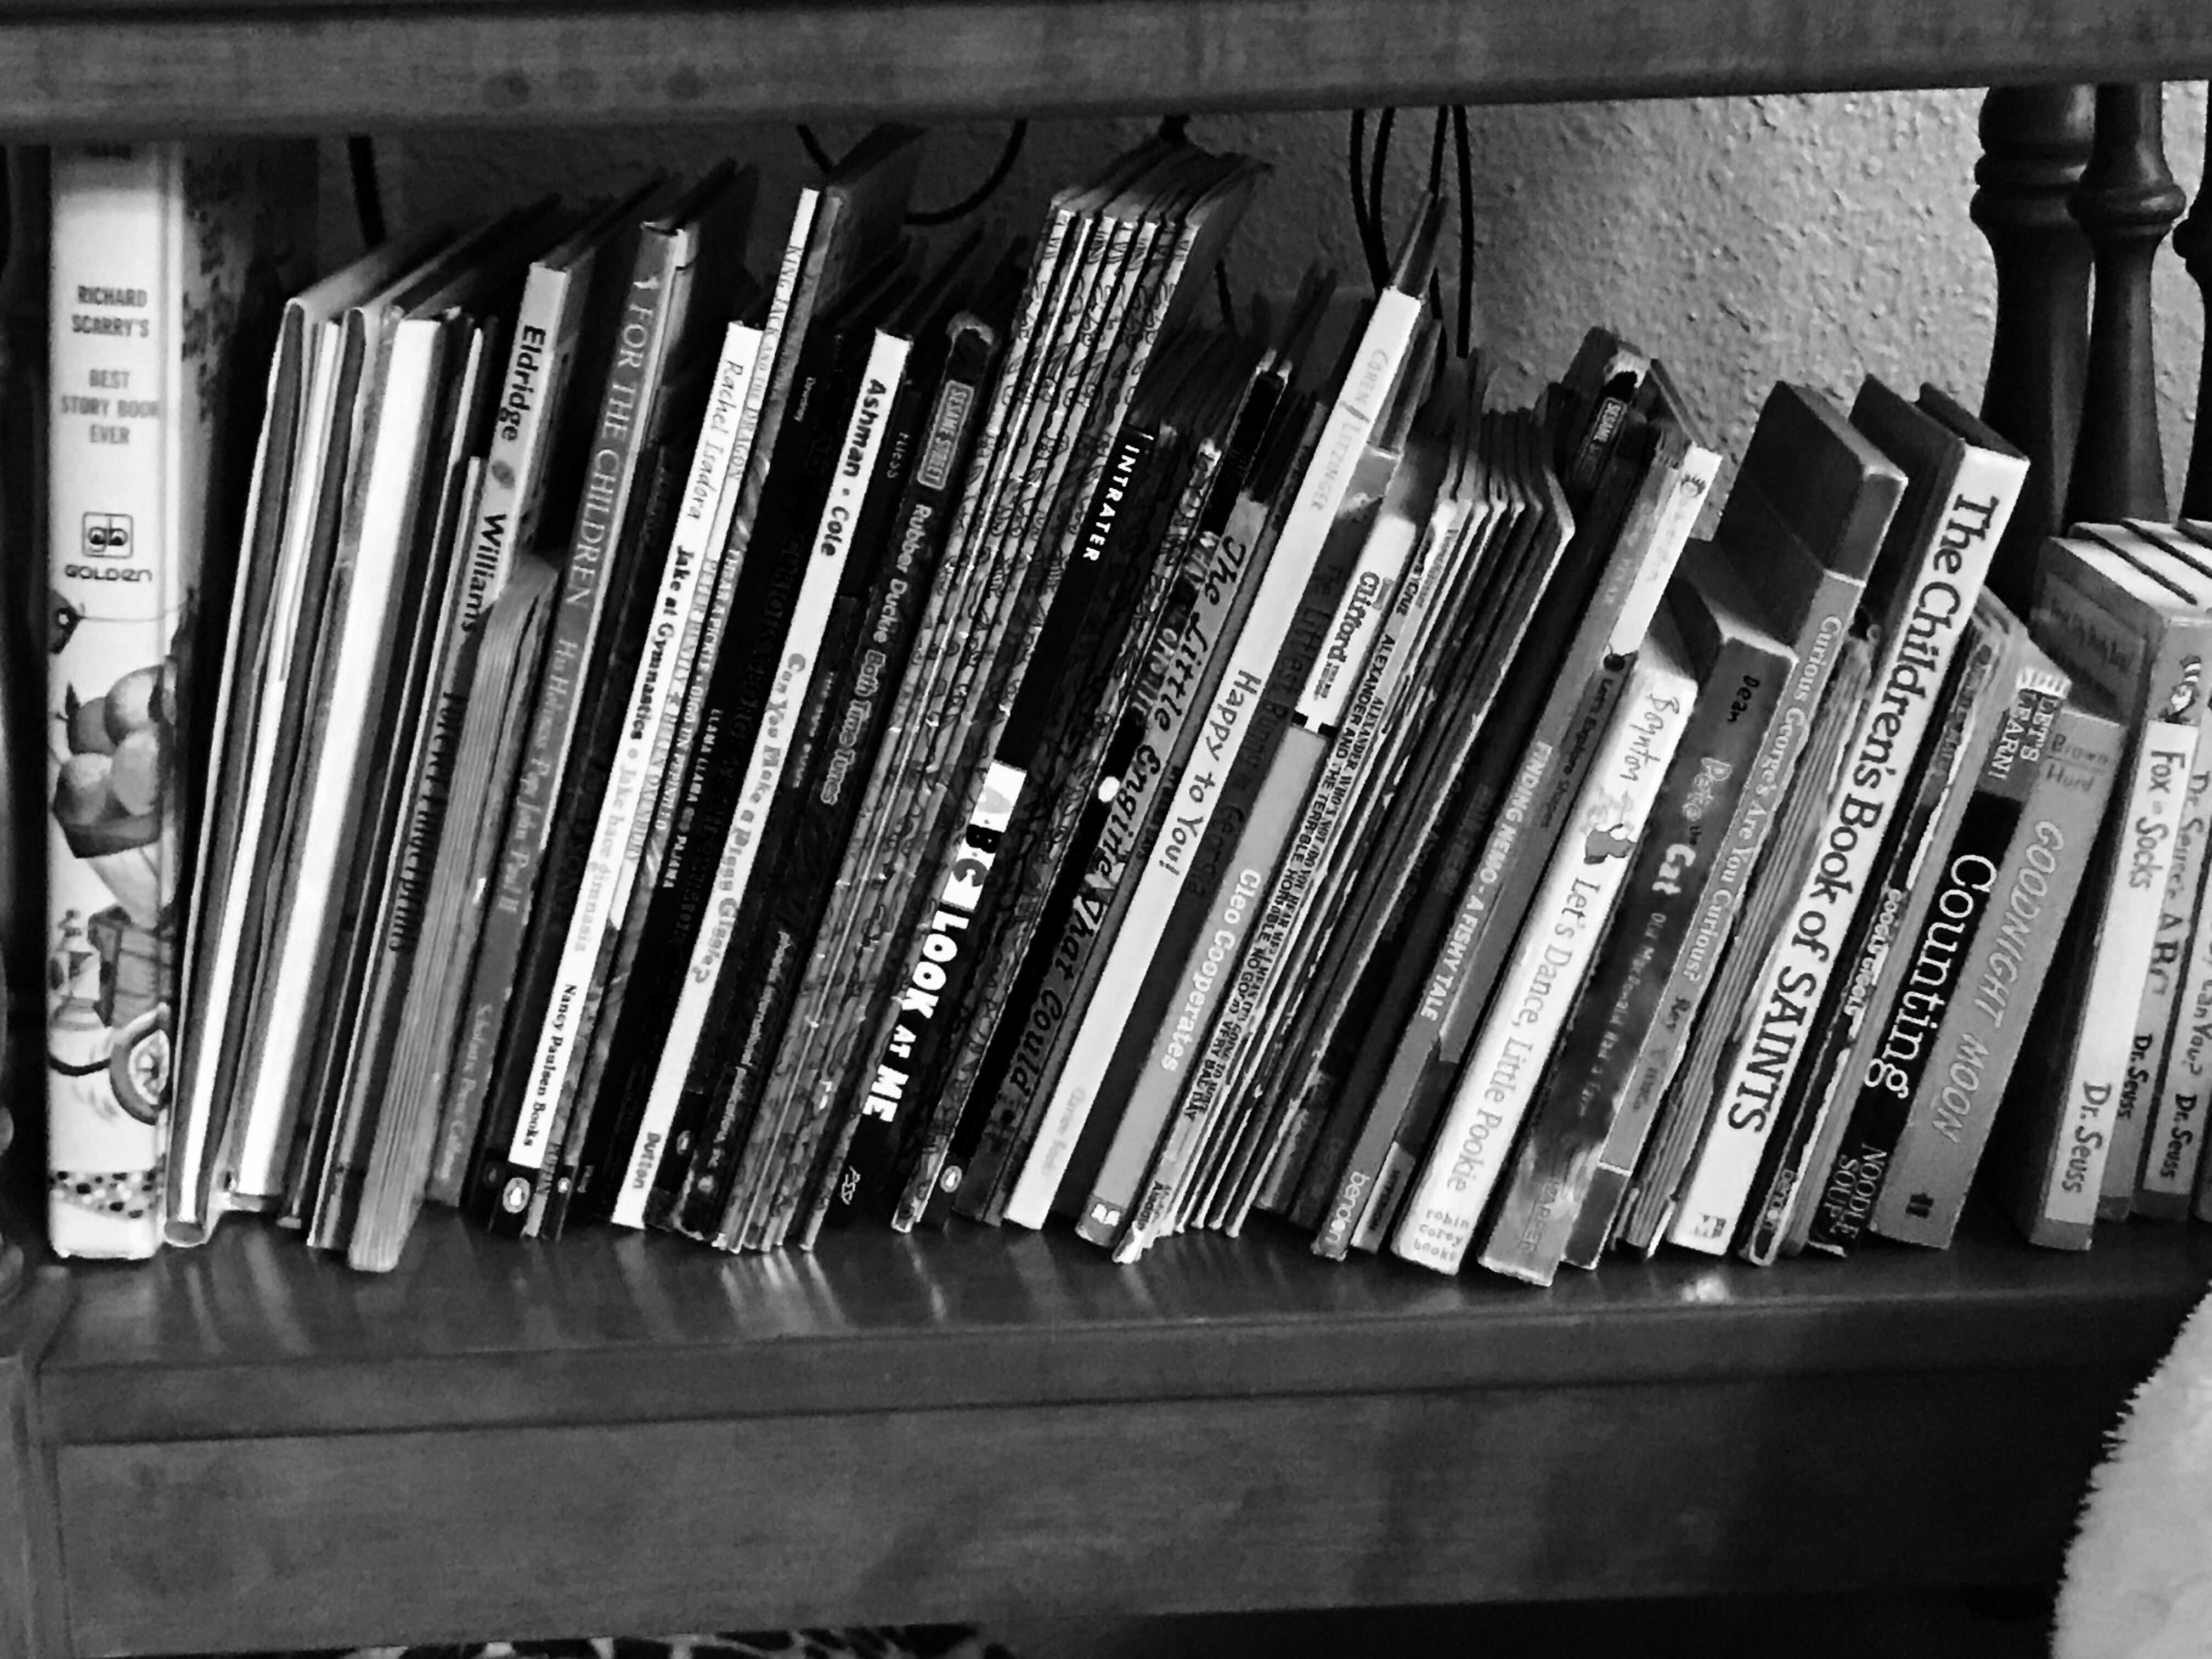
Our toddler is 2, so I am not talking a hardcore curriculum here folks. I print out coloring sheets for 1 letter of the alphabet a week, practice counting, learning basic colors and shapes. We also go outside and explore nature, read extra stories, and have music and dance time. We learn through playing. Something she would be doing anyways, but to help structure our days a little better. This has helped keep us from losing track of time and keeping her on a routine.
Having our “classroom” time has helped in so many ways! She is speaking better, she can do more problem solving on her own, and she can identify objects without help from me or her Dad. As we have all grown older we learned to plan our “play” so to speak. When we go bowling, or to the movies, even when we meet up with friends. Kids do not do that! Especially at this young of an age. It is something we learn. So I can better be able to play and my daughter is better able to learn; I have come up with some strategies to help make playing and learning fun for both of us.
Struggles Come and Go:
Before I get to the fun activities, let me just say this; some days are a struggle. I have read other blogs on homeschooling, and introducing the idea of school to toddlers all of them have the same thing: if school is not fun at this age stop! So when she has a day where she does not want to color, or play games, or even have structured time of any kind; we stop. I want her to love learning, I can sneak it in other ways. No sense in her having a meltdown, or fighting me every step of the way. There will be time for that later down the road. When she is actually able to begin rationalizing.
Now because I am a stickler for organization and sticking to a plan; I created a loophole for me too. She cannot be the only one to get her way you know! My loophole is this:  either we start our activities later in the day when she is more willing to participate, or we just wait till the next day. I just switch up my weekly schedule. For me this is a great relief because everything I want to get done gets completed. Also I more peace out of the day. Happy toddler, Happy life.
Always remember you are not failing your child. I have had to look at her days of not wanting to have school as a lesson in creating her own boundaries. Some days she does not get to decide what or when she gets to do anything. Somedays I just have to tell her this is how it has to be done. However for now; it is a good way for she and I to communicate. 🙂
And Now for Our Games!
There are lots of games that you can use to teach your children anything. These are just a few of the ones that have become our favorite recently. So much so that I just had to share!
Color Sorting and Shape Sorting Games:
I put these two together because they are very similar in what you need to make them; as well as how they are played.
Color Sorting Game:

This game has been awesome for helping my toddler start recognizing colors. It is very simple, and economical for us parents too.
What you will need is:
- Craft Pom Poms, (The more basic the better.)
- Paper or styrofoam plates, enough to match all of the colors you have.
- Crayons or Markers in the colors you have.
- A sheet of white paper.
- Pair of scissors.
- Bucket or container big enough to hold it all.
Most of the items needed can be purchased at any dollar or discount store. There will be more of some colors than others. That is okay so long as you think you have enough of every color. Toddlers tend to have very short attention spans, so we have to be willing to accomodate them. 🙂
How to put it together:
- Count how many different colors you have in Pom Poms. (My game has 9 different colors.) This is the number of tags and plates you will need.
- Write in Crayon or Markers on your sheet of paper what the colors are in their matching color. This can help your game last longer in your child’s education too. They can learn to recognize what the word looks like. (For white, I wrote it in Gray for obvious reasons.)
- Cut out your Color Tags.
- Place all of your Pom Poms, Color tags, and plates into your container for easy storage. Bam! You’re set to play!
How to Play:
This is where the fun and magic start to happen. You can modify this as your child’s memory of what color is what improves to provide them with new challenges too. However, for basic game play this is what I do. 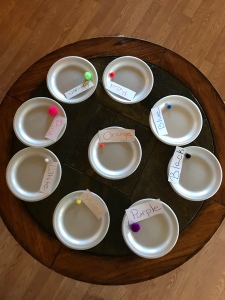
Game Play:
- Set up your plates around the table you want to play on. (We prefer our coffee table.)
- Then place your Color Tags onto the plates.
- Add 1 Pom-Pom of each color onto the matching plates.(This gives a great visual for your toddler to work with, and understand.)
- With the other Pom-poms in the bucket, start by pulling out one and ask your child to place it with the one that matches it.
- NOTE: My daughter likes to keep trying the wrong ones just for fun; once she gets on a roll. This is because I make noises when she is right or wrong. She seems to think the buzzer noise when she is wrong is funny. Just let them have fun. 😀
- Once they get the hang of what colors are what, let them reach into the bucket and pull out one to match.
- NOTES: This adds a new level of challenge. We generally do this at the end when she is starting to tire of the game. It gives us a few more minutes of fun before we move onto a new activity.
- Watch out for neon colors. Neon yellow and Neon green in Pom-poms tend to look quite similar and both you and your toddler will have a difficult time identifying where they need to go. I learned this one the hard way.
- To advance the level of difficulty of play, as your child becomes consistent in placing all of the Pom-poms where they belong as well as with age; you can make the following changes:
- Remove the Color tag so that they have to tell you what the 1st Pom-poms color on the plate is.
- You can also remove the 1st Pom-pom on each plate so that your child especially if they are learning to read can only use the color tags to identify where the Pom-poms need to go.
Shape Sorting Game:
While this game is very similar in play and set up and construction of the Color Sorting Game; it does have a little more versatility by the fact of you can add and change the shapes you decide to use. Sometimes even in the way you decide to label your shapes.
What you will need:
- You can reuse your plates from the Color Sorting Game.
- Enough Construction Paper to make the number of each shape you want.
- Scissors
- Markers
- White Sheet of Paper
- White Crayon

In all honesty I used a white crayon because I was using darker colored construction paper, so it made it easier for me to see where I needed to cut my shapes.
I focused on some of the more basic shapes that kids seem to learn first. It also allowed me to get a little creative because shapes like Diamonds and Triangles tend to come in different styles. So I got to play with some of these too! My lines are not perfect but they are close enough to give my toddler the right idea. So parents have fun with this! Once I had drawn my shapes, I cut them out. All in different sizes, and the few that had them had some variation to them.
Then I got creative again making the shapes tags. I wrote the name of the shape on my sheet of paper and then drew on the shape around the word of the shape to help simplify game play just a bit. Unlike with the Color Sorting Game where you would add a Pom-pom next to the Color tag, the shape is already on the Shape tag so you do not need to place the additional shape.
Now you set up this game the same way you would the Color Sorting Game. All you do not need to do is place a shape next to the Shape tag because they shapes have all been drawn on their tags. 🙂
You can also play it much like you would the Color Sorting Game. You hand your child the shape and ask them to place it on the plate that has the matching shape. My challenge for my daughter here was to do Squares and Diamonds. She has like with her colors picked up quickly on what her shapes are playing this game with me during our classroom time. Towards the end I give her a chance to pick her own shapes to match. It adds a little longevity to our structured play time.
Our Final Game is…:
We teach by example. That is something that my own Mama told me all of the time. Be the example not the follower. This is true for teaching children charity, cooking, doing laundry, paying our bills; everything. My daughter loves playing in her toy kitchen. I take her to the grocery store with me a lot, and she loves it there, lol. We talk about different foods and what I need to get off of my list. Well, this lead to the brilliant idea that for our letter of the week a couple weeks ago was the letter G. G is for Grocery Store. It was really a simple game to set up for her. However, because of her age some of the concept was lost on her. She wanted ALL OF THE FOOD! Not just what was on her list. Though in time I am sure she will understand it. This is a great game for older children, but super easy to do especially if you already have a toy kitchen with foods. 🙂
What you will need:
- A computer or phone with the ability to hook up to a printer.
- A printer
- A search engine
- Toy food to match what you are putting on your list
- A toy basket or buggy (Shopping cart for those who aren’t in the South)
 I started by making the shopping list. Since our letter for that week was “G” I wanted some things that had “G” either in their name or description. A few of the others were added because my daughter could recognize them easily. *Remember* the idea with introducing some of these games is just plain fun, with undertones of learning.
I then went into a word processing program to put in all of my images to make the shopping list. I also wrote the name of the food next to it because again, I want her to recognize the letters in the words. I am playing right along side of her so I have total control of what she is looking for first. I know sneaky but it allows me to guide her in the direction I want her to go in our “Grocery Store”
Setting up our pretend Grocery Store, I did get a little creative. I did not want a bunch a shelves that were never used except for one thing, nor do I have the room for all of that.  I used what I already had. My dining room chairs! It was quick, simple and the perfect height! On days we play this game, while she is watching Curious George, or Daniel Tiger’s Neighborhood; I turn all of the chairs in the dining room around. So that their backs are against the table. Then I go to the storage tub that has all of our toy food for her kitchen and I find the foods that are on our list first and place them out on chairs. Rarely do I put more than two items on the same chair or “isle” as I call them when the chairs are turned around. Then I find other foods and place them on the “isles”.
I go and find her toy buggy and gather up our list and anything else that we may need to play the game. When we are ready to play I call over my little shopper and we run through a check that I do before we actually leave to go to the REAL grocery store. This happens at the entryway of our dining room for our purposes. Do you have your purse? Do you have your list? Do you have your money? (I used to be really bad about leaving my wallet at home, so this actually had to become a question for me.) She checks for her coins from her counting piggy bank toy, (I always try to use what we have on hand. You could easily make fake money if you wanted to.) Then we walk into the store and I direct her to tell me the first thing on her list. We go through the store and find the first thing on her list. She places it into her buggy, and then we go on for the next and so on. Well this is when things can get a bit too exciting. 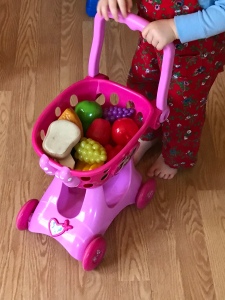
At the age of two and you are getting to “Grocery Shop” like Mama; you tend to get excited after a couple of items on your list. Now in an actual store I would freak out if she just started throwing things into my buggy; though we are not in an actual store just her pretend store, so she wants everything she sees on the “shelves”. I try to redirect her but I do not always win. The name of the game is to make learning fun. Well she has fun alright! When she finishes cleaning off the isles she goes to “check out” where I ring her up, and she ends up over paying me, lol. When I tell her this she just say, “Oh. Ok bye bye!”
My Goal:
There is a reason I tell y’all some of the things that tend to happen when we play these games. For one they are funny, for the second; it shows how flexible you need to be willing to be when trying to start introducing your toddler to “school time”. I know there are not a lot of parents who do not think they have the patience to do this. I used to think the same thing about myself. I found that I love our little homeschool time. It is growing time for both of us, and it is so much fun watching my daughter learn so much about the world around her. It has also been great having some structure to our day as well.
My goal with playing these games with her is so I can have some of the organization that I feel that I need at times; while introducing her to how fun learning is. Also as she gets older if she thinks that learning is fun; then perhaps class time will not feel like such a chore but more of an exploration into new horizons of the world around her.
I hope everyone gets a chance to try these games. They are not much, but if you are wanting to start your homeschool time with a budget in mind, or just want some fun games to play with your kids to help them learn these are really fun in our house.